🍞 The Lazy Baker's Guide to Sourdough Bread
Since May 2017, I’ve been the proud owner of a Panasonic ZB2512 Automatic Bread Maker. One of those quick and easy bread makers where you throw in all the ingredients, choose a menu setting, press ‘start’ and just sit down and relax. Four hours later, the house is filled with an intensely delicious smell of a freshly baked loaf.
We’ve tried all kinds of flour types, from classic white flour to more darker Waldkorn(tm) flour and baked fingerlickingly delicious chocolate breads. We quickly switched from butter to adding clear pork fat in the bread, improving the tast just a tad.
Fostering Flatulent Fungi
Until now I’ve been using Sacchoromyces cerevisiae, or common baker’s yeast as a leavening agent in my bread. This strain of yeast converts the fermentable sugars in the dough into alcohol (ethanol) and carbon dioxide.
Now it was time to up the ante and actually grow my own strain of yeast instead of buying instant packages of baker’s yeast. Now it was time for Sourdough.
Before baker’s yeast and chemical leavening agents, bakers grew and nurtured their own yeast by combining flour and water and let it ferment in a vessel in open air. Bacteria within the flour and in the air would feast on the nutrients and breed.
Let’s give that a try! Start out by combining 50g of regular white bread flour with 50g of water. Keep the lid ajar to let in the naturally occurring yeasts in the air (oh yes, they are there).
Keeping them well fed is of the utmost importance if you want them to endure. After all, you will be thinning out the colony every time you bake a loaf. Have a daily feeding routine: I fed mine every evening by adding 50g of flour and 50g of water; always the 1:1 ratio.
After a few days you’ll start to smell a sour odour and see tiny bubbles appear. The bacteria population, called lactobacilli, is growing. This is a common strain in the food industry that converts sugars into lactic acids and is used in the production of yoghurts, cheeses and other common fermented foods like pickles and sauerkraut.
Maintain the daily feeding routine and keep your sourdough starter stored at a comfortable temperature (19°C-22°C). It took me 9 days from nothing to a thriving yeast.
Congratulations, you know have your sourdough starter.
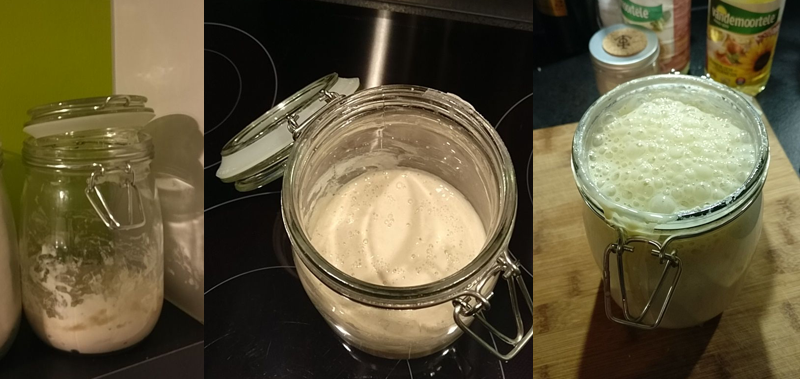
How quickly they grow, from left to right: first, eight and ninth day.
You can make your sourdough dormant by putting it in the fridge. In this state, you’ll only need to feed it once of twice a week.
Fresh Bread in the Morning
Like people, yeasts work better on a full stomach! Be sure it is fed at least three to four hours in advance so it is bubbly. If you put it in the fridge, you’ll need to take it out and feed it at least 24 hours in advance. If you want to test if your sourdough is ready to use, drop a teaspoon of it in water: if it floats it is ready, otherwise it is not active enough yet.
Start this recipe about 45 minutes before going to sleep and you will have a freshly baked loaf of bread in the morning.
Add these ingredients in order to the baking tin:
- 100g sourdough starter
- 500g (white) flour
- 15g of salt
- 300g water
Sourdough yeasts are not so active as regular baker’s yeast and require additional time. So we’ll combine two unrelated preprogrammed cycles to increase the leavening time.
-
Pizza (menu 28)
A setting that only kneads the dough and takes around 45 minutes.
-
Timed French Bread (menu 9)
This setting takes about 5 hours to knead, rise and bake the bread. The time between both programs will be spent as a pre-rise.
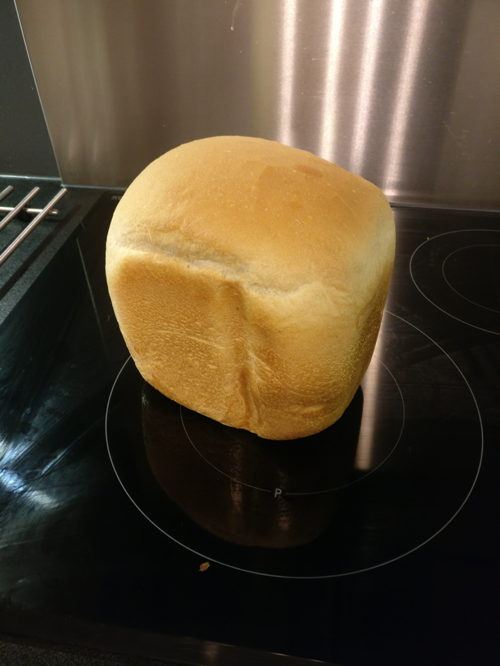
When I got up this beauty was waiting for me in the baking tin!